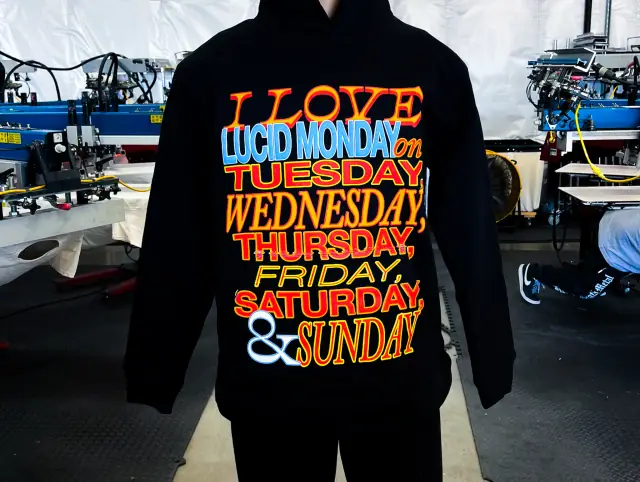
Standard, oversized and jumbo: where the lines fall
Printers use these words loosely, and two shops can mean different sizes by "oversized". The reliable habit is to talk in inches: width first, then height, measured on the art at the size it will print. The bands below are typical for adult tees and crewnecks.
| Category | Typical print size | Screens and platen | Where you see it |
|---|---|---|---|
| Standard full front or back | About 10–12 in wide, 10–14 in tall | Standard frames (20 x 24 in is the common workhorse) on a standard adult platen | Logo tees, event shirts, staff shirts |
| Oversized | About 12–15 in wide, up to roughly 16 in tall | Often still a standard frame; sometimes a larger platen | Retail graphics, back prints on boxy cuts |
| Jumbo | About 14–16 in wide or more, 16–20 in tall or more | Larger frames (23 x 31 in or bigger) and oversize platens or pallets | Streetwear front and back pieces, tour backs, big photographic prints |
| All-over | Past the press's image area, often edge to edge | All-over pallets, or a different process entirely | Pattern repeats, full-wrap graphics |
A 14 x 18 inch print, for example, is jumbo territory on most tees: wider than a standard full front and taller than a 20 x 24 inch frame holds with comfortable clearance. Once a design has to cross seams, wrap the sides or run onto the sleeves, it is no longer a jumbo print. That is all-over or over-the-seam work, covered in all-over print vs over-the-seam printing. The standard placements that jumbo prints grow out of are in the print placement and size guide.
What limits how big a print can be
A print can only be as large as the weakest link in a chain of equipment and garment limits. Ask about each one, because a shop with a big press can still be held back by a narrow platen or a small flash unit.
The press's image area
Every press has a maximum image area: the largest print its heads and pallets are built to register. It varies more than most buyers expect. Within M&R's Sportsman EX line of automatic presses alone, the listed maximum image runs from 16 x 18 inches on one model to 20 x 28 inches on another. Manual presses vary just as widely. Some automatics handle oversize work by indexing two stations at a time, which slows output.
The screen frame
The image needs open mesh around it. The squeegee has to start and stop off the art, and the mesh needs room to flex and snap away from the shirt after each stroke. A 20 x 24 inch frame covers most standard work; jumbo prints usually move to 23 x 31 inch frames or larger. Bigger frames also need a larger exposure unit, larger film positives and more emulsion, so the shop has to be set up for them end to end.
The squeegee
A squeegee should run wider than the image, roughly an inch past the art on each side, so a 16 inch wide print wants a blade of about 18 inches. Pulling an even deposit across a long, wide stroke is hard by hand, which is one reason big prints favor automatic presses. Squeegee durometer, the hardness of the blade, matters more at this size: softer blades lay down more ink, harder ones less.
The platen or pallet
The platen is the flat board the garment is loaded onto, and the print cannot extend past its edges, because fabric hanging off the board has nothing firm beneath it. A standard adult platen is commonly around 16 inches wide. Oversize platens and pallets exist in many sizes, but a bigger board creates its own problem, covered in the next section: it has to fit inside the garment.
The flash and the dryer
On dark garments, a white underbase is printed first and flash cured so the colors can sit on top. The flash unit has to heat the whole image evenly, or the edges stay tacky while the center scorches; oversize flash panels exist for exactly this. After printing, the conveyor dryer has to cure a wider, heavier ink film all the way through, which can mean a slower belt.
The garment sets the real ceiling
Even with unlimited equipment, the shirt decides how big the print can go. Four measurements matter.
- Body width of the smallest size. Take the chest width laid flat from the size chart and subtract a couple of inches of margin on each side. Ink that reaches the side seam or the underarm looks like a mistake and prints badly over the seam ridge.
- Collar to hem. Jumbo fronts often start a little higher than a standard full front, around 2–3 inches below the collar seam, and stop well above the hem so the graphic does not fold into a waistband.
- Platen fit. The garment has to slide onto the board without being stretched. A Small or a fitted women's cut pulled tight over a jumbo platen relaxes when it comes off the press, and the print shrinks and distorts with it.
- Construction. Pockets, zippers and side panels interrupt the print area. A hoodie front has far less height to offer than a tee front of the same size, because the pocket sits in the way. Printing on sleeves, hoods, pockets and zippers covers those spots.
Cut matters as much as size. A boxy or drop-shoulder blank is wider than its tag size suggests and gives a jumbo print more room, while a slim or women's cut gives it less. Boxy, oversized and streetwear fits explains the measurements that define each cut.
One print size or graded sizes
On a left-chest logo, nobody notices that a Small and a 3XL carry the same print. On a jumbo graphic, everyone does: art sized for a 3XL swallows a Small, and art sized for a Small looks like a postage stamp on a 3XL. There are three ways to handle a size run.
| Approach | How it works | Trade-off |
|---|---|---|
| One print size | The art is sized to fit the smallest garment comfortably | One set of screens and the simplest setup, but the print looks small on the largest sizes |
| Graded print sizes | The art is scaled into two or three size groups (for example S–M, L–XL, 2XL and up), each with its own screens | Better proportion on every size, but every color needs a screen per group and each group is its own setup on press |
| Placement only | One art size, with the distance from the collar adjusted per size | No extra screens; the print sits better without changing scale |
Grading multiplies screens: a four-color design graded into three groups needs twelve screens instead of four, plus the press time to change and register each set. It also complicates size run planning, because each group behaves like its own small job. Youth sizes almost always need separate art. The pattern-making term for scaling between sizes, grading, applies to prints in the same way, and the decision is easiest when you can see a mockup of the print on the smallest and the largest garment side by side.
Ink, feel and curing on big prints
Hand feel, the way a print feels to the touch, changes with area. A small plastisol logo barely registers. A 15 x 20 inch block of plastisol over an underbase is a heavy, warm patch that does not breathe and can feel like a sheet of vinyl across the chest. Three levers keep a jumbo print wearable:
- The ink. Water-based ink and discharge ink soak into the fabric instead of sitting on it, so a large area stays soft. Discharge only works on cotton dyed with dyes it can bleach out, so confirm the blank first. Screen printing inks and plastisol vs water-based ink compare them in depth.
- Less solid coverage. Open artwork, distressing and halftones let fabric show through, which reduces the ink deposit and the weight. A solid rectangle is the heaviest jumbo print there is.
- Mesh and deposit. Higher mesh counts lay down thinner ink films, and on a dark shirt the underbase is usually where most of the weight comes from. Mesh count and print feel explains how printers tune it.
Curing gets harder as the print grows. Plastisol has to reach its cure temperature through the full thickness of the film, and a wide, thick deposit takes longer to get there. An undercured jumbo print can look perfect coming off the dryer, then crack or lift in the first few washes. Printers check this with stretch tests and wash tests on early pieces, and a strike-off, a test print you approve before the run, is worth asking for on any large graphic.
Preparing artwork for a jumbo print
Big prints magnify file problems. Low-resolution art that looks fine on a laptop turns soft and jagged at 16 inches wide.
- Resolution at size. Raster art should be about 300 dpi at the final print size, so a 14 x 18 inch print needs 4,200 x 5,400 pixels. Vector art (AI, EPS, PDF, SVG) scales without loss and is the safer choice.
- Separations per size group. If the print is graded, each group needs its own separations, and halftone settings should be checked for each so the dot pattern keeps the same character from size to size.
- Safe edges. Keep faces, text and key details away from the outer inch or two of the art, where side seams, folds and the curve of the body distort them.
- A paper test. Print the design at full size on paper, hold it against the real blank in the smallest and largest size, and look at where it lands on a body, not on a flat table.
Preparing artwork for screen printing covers file formats, separations and what a printer sends back for approval.
What makes oversized prints cost more
A jumbo quote has the same structure as any screen printing quote, but several parts grow with the size of the print:
- Larger screens, films and emulsion for every color, and in some shops a separate stock of jumbo frames.
- More ink per garment, and on dark garments a larger underbase underneath it.
- Slower production. Long strokes, longer flash times, careful loading on big pallets and, on some presses, double indexing all cut pieces per hour.
- Special pallets or a manual press for prints that run past the standard image area.
- Graded screen sets when the print is scaled by size group.
- More testing and a costlier mistake, because a misprint on a jumbo graphic cannot be hidden or reworked.
Because the setup is bigger, minimum quantities for oversized work are often higher than for a standard front print. The ways to keep cost down are the familiar ones: fewer colors, open artwork rather than solid blocks, one print size if the run allows it, and a blank with enough body width to take the art without special fixtures.
Questions to settle before you order
- What is the largest image this press, frame and platen combination can print, in inches?
- Will the print fit the smallest size in the run without stretching the garment over the board?
- One print size for the run, or graded art, and how many size groups?
- Which ink keeps a print this large comfortable on this particular blank?
- How far below the collar will the print start, and does that change by size?
- Can you see the print mocked up on the smallest and largest size, and approve a strike-off before production?
Sources
- M&R Sportsman EX automatic press specifications (maximum image areas and frame sizes), checked 2026-10-04
- Screenprinting.com: The tools needed for oversized prints, checked 2026-10-04
- GraphicsPro: What are the most common screen sizes?, checked 2026-10-04
- Screenprinting.com: T-shirt design placement guide, checked 2026-10-04
Useful for: clothing brands, bands, skate and surf shops, creators.