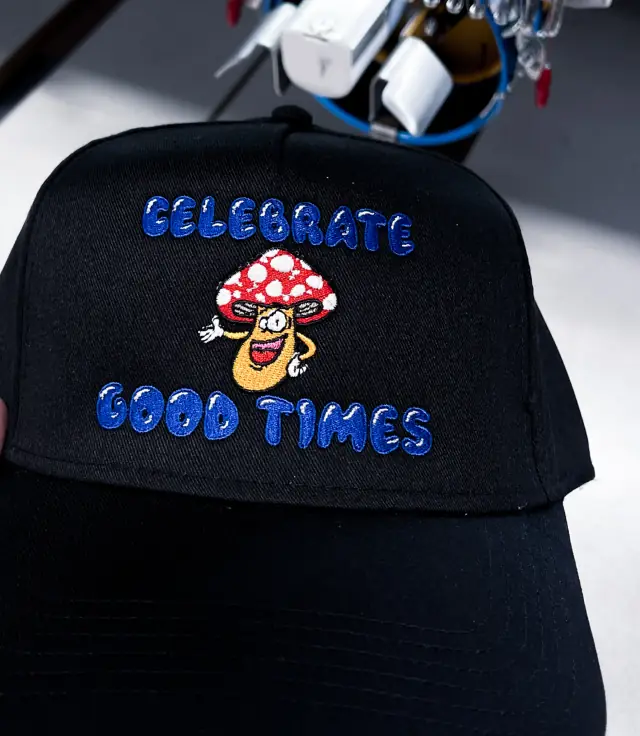
The patch types compared
A patch is a design made separately from the garment and attached afterward. That simple fact is its main advantage: the patch can use a material or method the garment could never take directly, and it can go onto almost anything.
| Type | How it is made | Detail | Surface | Wear | Good for |
|---|---|---|---|---|---|
| Embroidered | Thread stitched onto twill, then cut out | Medium; text from about 0.25 in | Raised, textured | Very good | Caps, jackets, uniforms, band merch |
| Woven | Fine thread woven on a loom | High; small text, thin lines | Flat, smooth, thin | Very good | Detailed logos, light garments, sleeves |
| PVC | Liquid PVC cast in a mold and heat-cured | High for clean shapes | Rubbery, layered | Waterproof and tough | Outdoor gear, bags, hats |
| Chenille | Looped yarn on felt with chain-stitched details | Low | Fuzzy, thick | Good; pile can flatten | Varsity letters, retro crests |
| Printed | Dye-sublimated onto polyester twill | Photographic | Flat | Good | Gradients, photos, illustrations |
| Leather or faux leather | Debossed, laser-engraved or printed | Medium | Smooth or grained | Good | Hats, denim, outerwear |
Embroidered patches
Embroidered patches are the classic: thread stitched onto a twill base on a multi-head embroidery machine, usually many patches at once on a single sheet, then cut out and edged. Everything about direct embroidery applies, from digitizing to thread choice, which is why the same text-size and detail limits hold.
The big design choice is coverage. With partial coverage, the twill shows through as the background, so its color becomes part of the design and the stitch count stays lower. With full coverage, thread covers the whole face for a richer, thicker patch that is stiffer and takes longer to stitch. Embroidered patches can also include raised 3D puff elements or metallic thread. A thin plastic or heat-seal layer on the back is often added to keep the patch flat and stop the edges curling before it is attached.
Woven patches
Woven patches are made on jacquard looms in the same way as woven labels: colored threads are woven together so the design becomes the fabric itself, rather than being stitched on top. The threads are far finer than embroidery thread, so small lettering, thin lines and fine detail survive that would close up in stitching. The finish is flat, thin and light, which suits sleeves, lightweight garments, beanie cuffs and hat sides where a thick patch would look heavy.
The trade-off is texture. A woven patch has none of the raised sheen of embroidery, and a loom carries a limited set of thread colors per run, so very colorful art may need simplifying. Woven patches sit close to labels and tags in production, so the private label finishing guide is worth reading alongside this one.
PVC patches
Soft PVC starts as a thick liquid: PVC particles suspended in a plasticizer, the same family of material as plastisol screen printing ink. Patch makers fill a mold one color at a time and then cure it with heat, which sets the liquid into a flexible, rubbery patch. Designs can be 2D, with flat layers at set heights, or 3D, with sculpted, rounded forms.
Because each color is poured into its own walled area of the mold, PVC artwork is drawn as clean shapes with outlines between colors. Gradients and soft shading do not translate, and very thin lines have minimum widths. The patch is a single molded piece, so every letter and shape must sit on a solid background layer; floating elements with nothing behind them are not possible. STAHLS' specification sheet, for example, lists solid colors only and requires a uniform background under every element. The mold is a one-time setup that can be reused for reorders. In return, PVC is waterproof, shrugs off mud, sun and abrasion, and wipes clean, which is why it dominates outdoor, tactical and bag patches. PVC is usually attached with hook-and-loop backing or sewn through a channel molded around the edge. Heat application works only on PVC patches made for it with a low-melt adhesive, pressed at the maker's stated time, temperature and pressure; do not assume an ordinary PVC patch can be ironed on.
Chenille patches
Chenille is the fuzzy pile of a varsity letter. A chenille machine pulls yarn up through a felt base one loop at a time with a hooked needle; Tajima describes its chenille machines making both this loop stitch and a chain stitch. The loops form the soft, raised fill, and chain stitch draws the outlines and lettering. The flat, 3D puff and chain stitch guide explains how these stitches relate.
Chenille patches are usually large, built on one or more layers of felt in contrasting colors, with bold shapes and very little detail. They suit letterman jackets, school and club merch, and retro streetwear crests. Their thickness means they are normally sewn on, though some carry a heat-seal backing. Expect the pile to flatten a little with wear, which many buyers see as part of the charm.
Printed and leather-look patches
When a design depends on a photo, a gradient or a detailed illustration, a printed patch does what thread cannot. The usual method is sublimation onto white polyester twill, which dyes the image into the fibers, finished with an embroidered or merrowed edge.
Leather and faux leather patches are debossed (pressed into the surface), laser-engraved or printed. They give a quiet, premium look on caps, denim and outerwear, and the options for hats are covered in hat decoration options. Genuine leather darkens and softens with age and does not love hot washes; faux leather is more consistent in color.
Borders and backings
Borders: merrowed or cut
The edge finish changes the look as much as the patch type does.
- Merrowed border: a thick, rounded overlock edge wrapped around the patch by a dedicated edging machine. It is durable, fray-proof and gives the classic badge look. It suits simple outlines best (circle, oval, rectangle, shield); a skilled operator can work some corners, but deep inside notches and sharp points blur, and some shapes cannot be merrowed at all.
- Hot-cut or laser-cut edge: the patch is cut along any outline with heat that seals the edge, usually after a satin border has been stitched as part of the design. This allows custom shapes that follow the artwork, with a thinner, flatter edge.
- Sealed or folded edge: common on woven patches, where the edge is heat-sealed or folded under like a label for a clean, flat finish.
Backings and how patches attach
| Backing | How it attaches | Good for | Avoid on |
|---|---|---|---|
| Sew-on (no adhesive) | Stitched around the edge by machine or hand | Everything; the strongest bond | Nothing, though it takes the most labor |
| Iron-on or heat-seal | Heat-activated adhesive, ideally applied with a heat press | Cotton, poly-cotton blends, denim, twill | Nylon, rainwear, leather, heat-sensitive or coated fabric |
| Hook-and-loop | Hook side on the patch, loop panel sewn to the garment or bag | Uniforms, tactical gear, swappable patches | Placements where the hook side rubs knitwear |
| Peel-and-stick adhesive | Pressure-sensitive glue | Event giveaways, packaging, one-day wear | Anything that will be washed |
Hook-and-loop is the generic name; Velcro is one brand of it. For garments that are washed often, a common approach is to heat-press an iron-on patch for positioning, then sew around the edge for permanence.
Sizing, artwork and ordering
Patch size is the first thing to settle, because it decides which type can carry the design. Many patch makers size a patch by averaging its width and height, so a 3 in by 2 in patch is treated as 2.5 in; check how a quote measures before comparing two of them. As a rough guide to where patches sit:
- Cap fronts: around 2 to 2.5 in tall, sized to the crown so the patch does not curl over the top or bend at the brim. Cap profiles and fits explains how crown height limits this.
- Chest and sleeve: about 3 to 4 in across on a chest, smaller on a sleeve.
- Jacket backs: 8 to 12 in or more, where chenille and full-coverage embroidery come into their own.
Each type has a sweet spot. Woven and printed patches stay sharp when small, which makes them good for tiny brand tabs and sleeve marks. Embroidered patches need room for lettering to stay at a readable height. Chenille only reads at larger sizes, because the loops need area to form. PVC holds crisp detail at small sizes as long as lines meet the mold's minimum width.
Send artwork as a vector file where possible, the size in inches, and colors as Pantone references. For an embroidered patch, say whether you want partial or full coverage; for PVC, say whether you want 2D or 3D; for every type, name the border style and its color. A digital proof shows layout and colors, and a physical sample is worth asking for on a first order, because texture and thickness are hard to judge from a screen.
What to specify when ordering
- Patch type and, for embroidered patches, coverage.
- Size as width by height, and the outline shape.
- Border: merrowed, hot-cut or laser-cut, sealed or folded, plus border color.
- Backing: sew-on, iron-on, hook-and-loop (with or without the loop side supplied) or adhesive.
- Colors as Pantone or thread references, and the background color.
- Quantity, plus whether the patches ship loose or attached to caps, jackets or bags.
- Who attaches them, and how: sewn, pressed, or pressed then sewn.
Putting patches on hats and garments
Caps are the most popular home for patches. A patch is usually sewn onto the front panel, either by an embroidery machine stitching around its edge with the cap on a cap frame, or on a patch-sewing machine. Heat-seal patches can be pressed onto suitable caps with a curved hat press. Structured fronts hold a patch flat; unstructured fronts and foam trucker fronts behave differently, as foam trucker hats explained describes.
On jackets, place and sew patches before anything is lined if you can, since stitching through a finished lining shows inside. On beanies, a patch on the cuff is a common alternative to direct stitching, covered in beanie decoration. On light tees, a heavy patch drags the fabric down; a woven or printed patch, or direct printing, sits better.
When a patch beats direct embroidery
- The item is hard to hoop. Backpacks, structured bags, finished caps with hardware and thick leather all take a patch more easily than direct stitching.
- The design is big or dense. Stitched straight into a hoodie, a heavy design can pucker and drag the fabric. On a patch, the stitching happens on stable twill and the garment only carries the finished badge, though it still adds weight where it sits. The stitch count and pricing guide covers other ways to tame a dense design.
- The detail is beyond thread. Woven or printed patches carry small text and gradients that embroidery cannot.
- One design goes on many products. Patches can be made once and applied to caps, jackets and bags as each is needed, which is easier than holding stock of decorated garments.
- The patch is the product. Bands, clubs, parks and creators sell patches on their own for battle jackets and bags, and they are light to ship and store. See band merch.
- The look calls for it. A raised border and badge shape say heritage and workwear in a way direct stitching does not.
Direct embroidery still wins when you want a soft, borderless mark, a small chest logo, or the cleanest premium look on a polo or knit.
Sources
- Tajima, TCMX series chenille embroidery machines, checked 2026-10-04
- STAHLS, PVC patches specifications and application instructions, checked 2026-10-04
Useful for: bands, clothing brands, sports teams, schools and clubs.