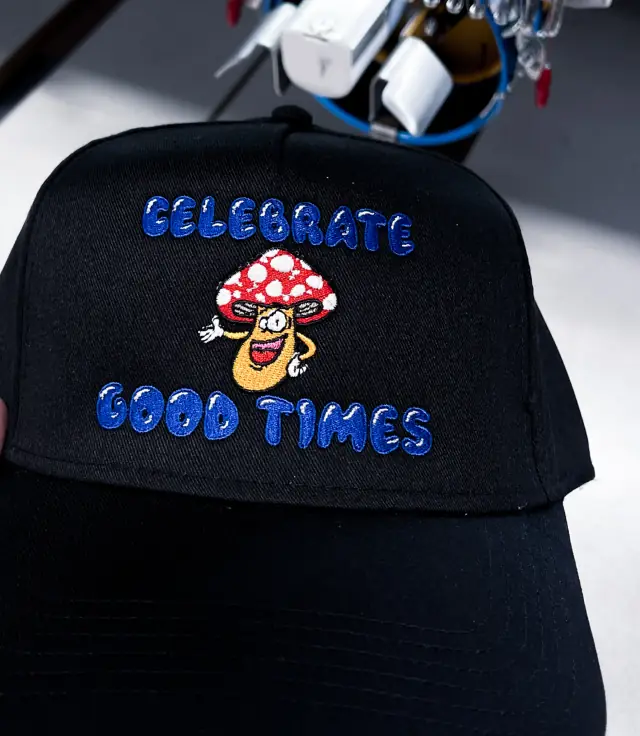
Hand embroidery and machine embroidery
Embroidery is any decoration made by stitching thread into a finished fabric. That separates it from weaving, where the design is built into the cloth as it is made (the way a woven label is produced), and from printing, which lays ink on the surface. Hand embroidery uses a needle, a hoop and stranded floss, and it is still how craft pieces and one-offs are made. Merch is embroidered by machine: a computer-controlled head follows a stitch file and repeats the same design on every piece, so a run of two hundred caps comes out matching.
Commercial machines form a lockstitch, the same principle as a sewing machine. The needle carries the colored top thread down through the fabric, a rotary hook underneath catches it and wraps it around the bobbin thread, and the two threads lock together inside the layers. Tension decides where that lock sits. When tension is balanced, the back of a satin column shows bobbin thread down roughly the middle third with top thread on either side, a check Madeira's digitizing guide recommends for standard-length stitches.
The machine: heads, needles and speed
A commercial embroidery machine has one or more heads, and each head stitches one garment at a time. A multi-head machine with six, twelve or more heads runs the same design on that many garments together, which is why embroidery scales well once a design is set up. Each head carries a row of needles, commonly 12 to 15, and each needle is threaded with one color. The machine moves to the right needle at every color change on its own, so a design within that color count runs without anyone re-threading.
Speed is quoted in stitches per minute, and ratings vary by model, from about 1,000 to 1,500 on flat goods and lower on caps. Tajima lists its TMBP2-SC at 1,200 on flats and 1,000 on caps; Melco lists its Summit at 1,500 and 1,200. Real production runs below the rated maximum, slowing further for caps, metallic thread, dense areas and delicate fabric. That conversion from stitches to minutes is why the stitch count of a design matters so much, as the stitch count and pricing guide explains.
Under the needle plate, the bobbin holds a lighter thread, usually white or black, that should never show on the front. Top threads, weights and fibers are covered in the embroidery thread guide.
The file: a digitized design
The machine cannot read a logo. It needs a stitch file that records every needle penetration as a coordinate, along with commands for jumps, trims and color changes. Building that file is called digitizing, and it is skilled work: the digitizer picks a stitch type for every shape, adds underlay to stabilize the fabric, sets the density, compensates for the way stitches pull the cloth in, and orders everything so the machine trims as little as possible. One logo usually needs one file for flat garments and another for caps. The whole process is in embroidery digitizing explained.
Hooping and backing
Before stitching, the garment is clamped in a hoop, an inner and outer frame that holds the fabric flat under the needle, with a layer of backing underneath. Good hooping is taut without stretching. A knit pulled tight in the hoop relaxes once it comes out, and the design puckers; fabric hooped loosely shifts while stitching, and outlines stop lining up with their fills. Hooping stations with fixtures keep placement identical across a run, and magnetic hoops speed up thick items and reduce hoop burn, the ring of crushed fibers a hoop can leave on pile or performance fabric.
Caps are not hooped flat. They mount on a cap frame that holds the curved front panel against a driver, and the machine swings the cap side to side as it stitches. Wide-angle frames, often called 270-degree frames, let a design run from one side panel across the front to the other. Cap limits are covered in hat decoration options.
Backing, also called stabilizer, is what stops fabric stretching and distorting under thousands of needle strikes. The rule of thumb: stretchy fabric gets backing that stays in, stable fabric can take backing that tears away.
| Backing | How it is removed | Typical use |
|---|---|---|
| Cutaway | Trimmed around the design; the rest stays in for the life of the garment | Knits: tees, polos, hoodies, fleece, sweatshirts |
| No-show mesh | A soft, light cutaway trimmed close | Light-colored or lightweight knits where heavy backing would show through |
| Tearaway | Torn off after stitching | Stable wovens: caps, twill shirts, denim, canvas bags |
| Water-soluble topping | Laid on top of the fabric, then torn or rinsed away | Pile and textured fabric: towels, fleece, corduroy, knit beanies |
Topping is the piece most buyers have never heard of. Without it, satin stitches sink into the loops of a towel or the rib of a beanie and small lettering disappears. The film holds stitches on the surface until they are locked in place.
Running, satin and fill: the three basic stitches
Almost every embroidered logo is built from three stitch types.
| Stitch | What it looks like | Used for | Limits |
|---|---|---|---|
| Running stitch | A single line of short stitches, or a triple run for a bolder line | Fine outlines, small details, hidden travel paths | Too thin to read from a distance |
| Satin stitch | Long, glossy stitches laid side by side across a column | Lettering, borders, narrow shapes | Snags when too wide; cannot form when too narrow |
| Fill (tatami) | Rows of shorter stitches in a staggered pattern | Large shapes and backgrounds | Flatter and less shiny than satin; adds stitches quickly |
A satin stitch is what makes embroidery look like embroidery: each stitch catches light along its whole length, so lettering looks crisp and slightly raised. Satin only works within a band of widths. Wilcom, which makes digitizing software, advises keeping satin columns within about 10 mm (roughly 0.4 in), because long, loose stitches snag on bag straps and seat belts. At the other end, a column narrower than about 1 mm barely forms. Wider shapes switch to fill, whose rows break the area into short stitches that lie flat and stand up to wear.
Beneath the visible stitches sits underlay, a light framework of running or zigzag stitches that tacks the fabric to the backing and gives the top stitches something to sit on. It cannot be seen on a finished piece, and skimping on it is a common reason cheap embroidery looks thin and patchy.
A run from start to finish
- The file is loaded and each color is assigned to a needle carrying the right thread.
- The garment is hooped over backing, or the cap is mounted on the cap frame.
- The operator traces the outline of the design to confirm it fits the hoop and sits where the mockup shows.
- The machine stitches underlay, then each color in sequence, trimming between separate elements.
- The first piece, the sew-out, is checked against the approved mockup before the run continues: embroidery's version of a strike-off.
- Each piece is unhooped, the backing is trimmed or torn, topping is removed, loose threads are clipped and hoop marks are steamed out.
What stitches well and what does not
Embroidery rewards bold, simple artwork with clear shapes and solid colors. In standard 40 weight thread, lettering reads cleanly from about 0.25 in (roughly 6 mm) tall; thread maker AMANN recommends a finer 60 weight thread for letters around 4 to 5 mm. Logos with a few solid colors and clean outlines stitch well on almost anything sturdy.
These are the usual trouble spots:
- Tiny text and hairlines. Thread has thickness. The enclosed spaces in small letters (the holes in e, a and o) fill in, and satin strokes narrower than about 1 mm break up in standard thread. Finer lines can be drawn with a single running stitch, but they read as thin and faint.
- Gradients and photos. Each needle carries one solid color. Blends can be suggested by layering stitch angles and colors, but a photo or soft fade belongs in print.
- Huge solid fills. A large filled area becomes a stiff, heavy plate of thread that traps heat and drags on light fabric. An outline, an open fill or a patch usually works better.
- Lightweight tees. Thin jersey puckers around a dense design and the backing can show through. Small, light designs are fine; full fronts are better printed. See t-shirt weights explained.
- Stretch and performance fabric. Moisture-wicking polyester and spandex blends need lighter density, a ballpoint needle and careful backing, and they still pucker more readily than cotton.
- Waterproof shells. Every stitch is a hole, so a rain jacket loses some water resistance where it is embroidered. That is one reason hook-and-loop patches are common on outdoor gear.
The fabrics that embroider best are the stable, medium-to-heavy ones: cotton twill caps, piqué polos, fleece, heavyweight cotton, canvas and denim.
Embroidery or print?
Embroidery and printing do different jobs. Embroidery adds texture and a premium feel, lasts as long as the garment, and is priced by the stitch, so it shines on small and mid-size marks on caps, polos, outerwear and heavy fleece. Screen printing and DTG lay down large, detailed or full-color art on tees at a lower cost per square inch and with a softer hand. Plenty of merch lines use both, with print on the graphic tee and embroidery on the cap and the left-chest hoodie. Screen printing vs embroidery compares the two point by point, and types of shirt printing covers every printing method.
Sources
- Tajima TMBP2-SC embroidery machine specifications, checked 2026-10-04
- Melco, Comparison of embroidery machines, checked 2026-10-04
- Madeira USA, Digitizing density guide (tension and thread use), checked 2026-10-04
- Wilcom, Mastering basic stitch types: satin and tatami, checked 2026-10-04
- AMANN, Small embroidery designs: precision starts with the right thread, checked 2026-10-04
Useful for: companies, clothing brands, breweries, sports teams.